Here at Readthetrieb we sometimes interpret things quite literally which explains todays’ tutorial fitting our motto this week: Big Apple. We are pretty sure that this great manicure will not only catch a lot of attention in one of the most stylish cities in this world: New York.
What you will need:

1x clear base coat
1x red polish
1x light green polish
1x dark green polish
1x brown polish
1x white polish
1x dotting tool or a nail art brush
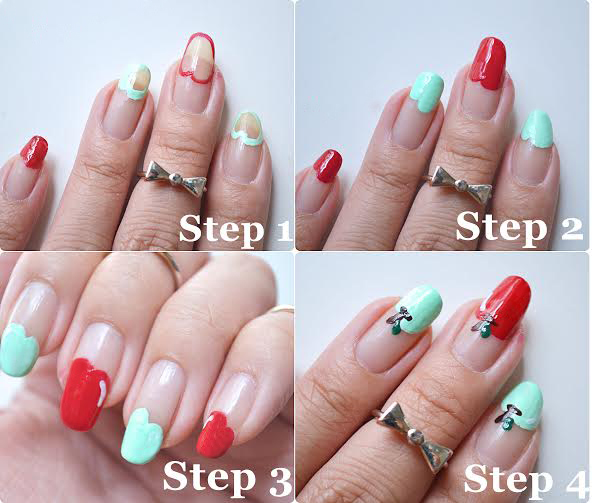
Step 1
To prevent any attention being taken away from those glorious apples, we’ll just use a clear base coat as a foundation today. Wait until your nails are completely dry. Now we are getting to the stars of today’s manicure: Them apples!
Step 2
We will need both the green and red polish now to create a part of the apples. In the end only the top half of each apple will be visible, this way it just looks more discreet and overall more aesthetic. Alternate between the green and red and paint kind of heart-shaped objects on the nails.
Step 3
In the third step we will fill out the apples completely. Afterwards create an accentuation suggesting light hitting the apples. I mean a perfect apple is usually associated with a beautiful, shiny skin. You will need a white polish for this. Just place a slight arc on the upper right corner or on the left side, just where light would naturally hit the apples.
Step 4
Now onto the final touches. Paint a brown stem with a small green leaf on each apple. That’s how they will appear much more interesting and realistic. That’s it guys, now you’re set for our apple week!

Copyright: ©Readthetrieb