The purpose of bronzer, blush and highlighter is not only to bring color into your face, but also to complement the shape of your cheekbones. Therefore your need to follow a few steps, that will help you to create the effect of naturally higher looking cheekbones. The first product you will need here, is a matte bronzer. The bronzer should be a matte powder, that is 2-3 shades darker than your actual skin color. The product doesn’t have to be a special bronzer, because you can always use a normal face powder for this step, it only has to be darker than your skin color.
The second product has to be a blush color of your choice. For the third product you will need a highlighter, meaning a shimmery powder, that is lighter than your actual skin color.
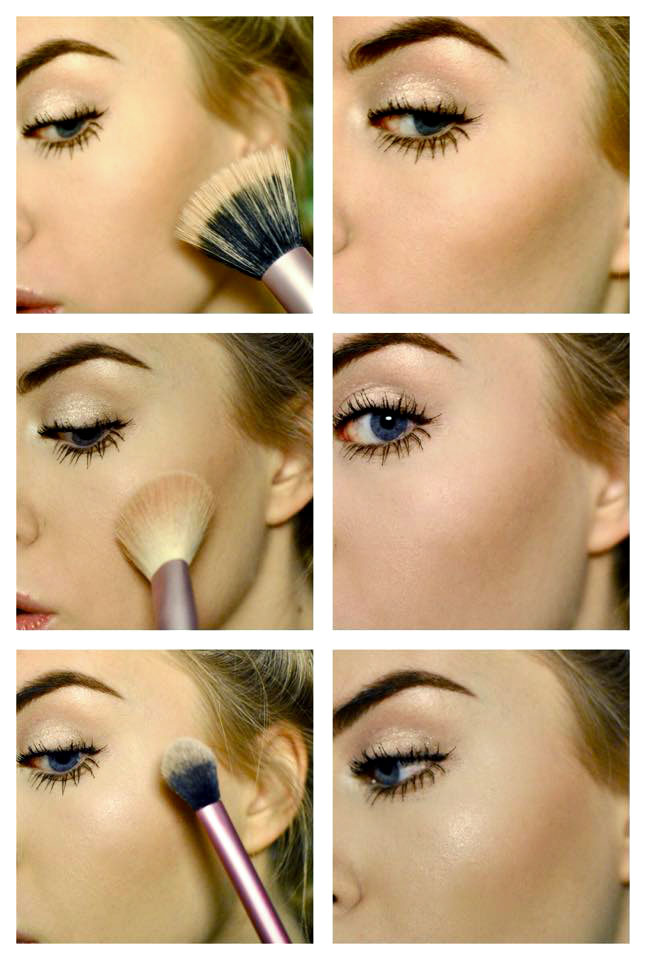
Step 1: To apply your bronzer, you will need the right brush to do so. There are a ton of brushes on the market to choose from, but the one I’m using here is a duo fiber brush by Sigma in the number ‘F50’. Start by creating a line below your cheek bones from your ear towards the corner of your mouth. Here I used the ‘Hoola’ bronzer by Benefit. After that blend out the color upwards.
Step 2: Now it’s time for the blush, which is supposed to be the transition color between your bronzer and your highlighting shade. Apply the blush (which can be any color you like) above your bronzer and blend the colors in to each other. The color I am using here is called ‘Coralista’ by Benefit and I used the ‘F40’ brush by Sigma.
Step 3: Lastly apply your highlight using a smaller brush (‘setting brush’ by Real Techniques) on the highest points of your cheek bones. While you do so, apply the product in a ‘C’ shape by dragging it up to the point above your brow. The product I used here is the highlighter ‘Soft an Gentle’ by MAC.
Copyright: Readthetrieb