Hey Beauties!
A bag filled with lovely wrapped up gifts – that’s the dream behind hopeful kids’ eyes and admittedly my dream as well, although I did learn to feel a great deal of pleasure whilst watching people unwrapping my gifts to them, too. 😉 However, today’s Manicure Monday will act as a tiny preview of what you’ll be hopefully seeing in two days’ time: a festive Christmas tree and loads and loads of presents underneath it.
What you will need:

1x white polish
1x red polish
1x green polish
1x golden polish
1x dotting tool or the end of a brush or a toothpick

Step 1
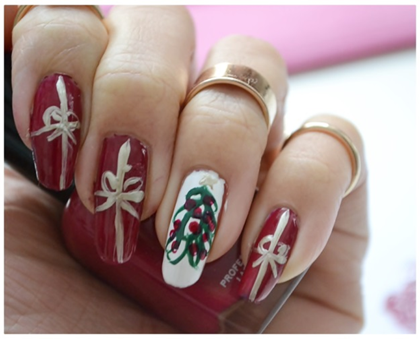
For today’s look, please be so kind and paint all of your nails red except for the middle finger, this will be your accent nail.
Step 2 and Step 3
With a golden polish enchant us with a few bows on your red nails. Start off by creating both a vertical and horizontal line on your nail. Then place a bow in the middle and you’re almost finished for today and prepared for Christmas Eve. 😉
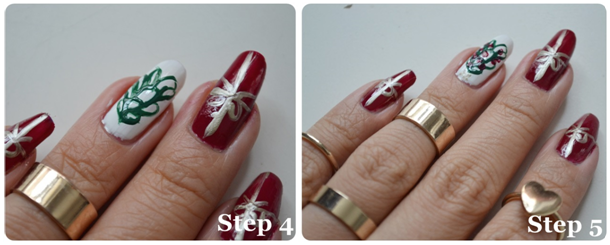
Step 4
But first let’s get on to the star of the show: the Christmas tree. Take a dotting tool with a small end and your green polish. Begin with the top of your tree and place oval shapes onto your nails. Slowly work your ways down to the trunk of the tree. You can see the oval shapes on image two. Don’t forget that the tree gets wider on the way down.
Step 5
Now onto the decorating part: Take your dotting tool and a red polish to place a couple of Christmas ornaments on your tree. And your golden polish for a star on the peak.
Yours truly,
Lana Hoang
Copyright: Readthetrieb