Hey Beauties.
Only two weeks from now and it’s the most beautiful time of the year: Christmas. I’ve been running around to gather some last minute presents. All those beautiful lights, jolly folks, the scent of freshly baked cookies and the pretty, decorated windows of the different shops really get my inner Christmas-loving child out. And if you’re not at all affected by now, let me show you a very festive tutorial for a design you can wear to feel as jolly as I do. 😉
What you will need:

1x dark red polish
1x golden polish
1x fine brush or a dotting tool or a toothpick
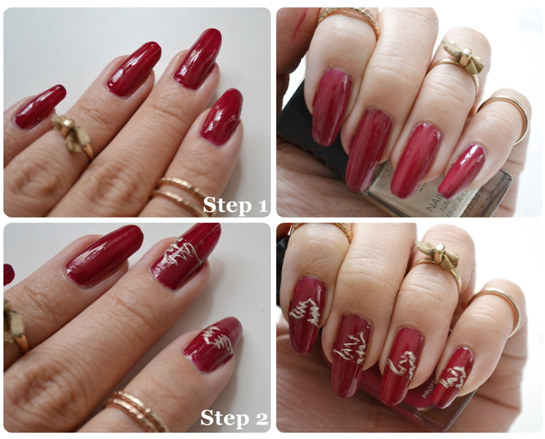
Step 1
Start off by painting your nails deep dark red. It may contain shimmer particles, but a plain red one will suffice.
Now take your golden polish and a thin liner brush or alternatively a thin toothpick. Retrieve a piece of paper and drop a few droplets of golden polish onto it, dip your brush in it and prepare for the next step.
Step 2
The design on all finger nails should form one whole line only. It should look like one whole picture. That means you have to connect every line from fingernail to fingernail. Start off with the pointer and draw a line on it. This will be your snow covered soil. And without even finishing this line, lift the brush and create a Christmas tree in the middle of the landscape.
Step 3
When you reach the end of your nail, just take off where you left on the finger nail next to you. Continue to do the same thing until you have reached the pinkie. Add to your thumb and you’re done. Now look at it, isn’t it incredibly elegant and something completely different?

Yours truly,
Lana Hoang
Copyrights: Readthetrieb