You’ll need:
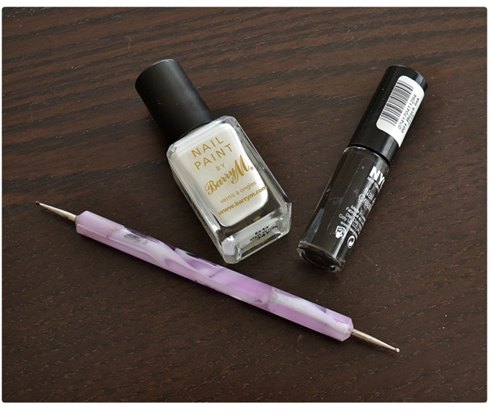
1x white polish
1x black striper or
1x dotting tool and a black nail polish
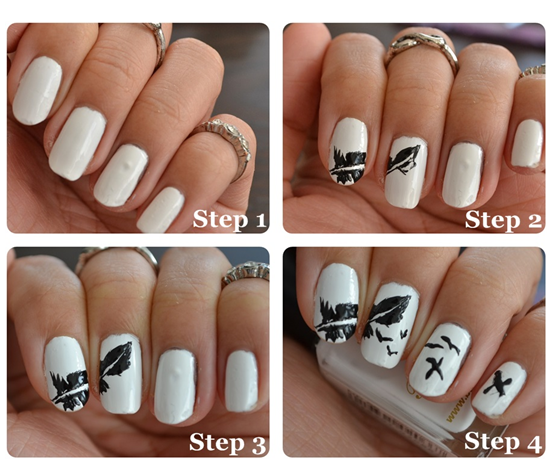
Step 1
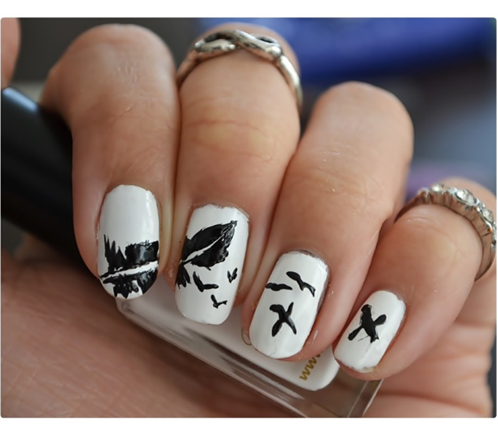
Hey guys! For this look, I used a white base (as per usual), this time around I used “Matt White” by Barry M. Afterwards I waited 15 minutes for the coats to dry.
Step 2
I have to admit, I was rather impressed and a little bit intimidated by the feather of this look. But it actually looks harder than it is. Just take your striper or black polish and a dotting tool and start off on the outline. Just use fine strokes to create the feather. The good thing is that you don’t necessarily have to work extremely accurate as real feathers aren’t perfectly sized up as well. Just put one stroke after another and make sure to leave out some parts once in a while. The most important thing here is to keep the stem white.
Step 3
On to the next nail. As I divided the feather into two parts it is crucial for us to continue right there where we left. That means the stem needs to continue on the next nail. And again, just use fine strokes to create even the end of the feather. Don’t stress yourself on being too accurate.
Step 4
Now, on the rest of the nails, I distributed some birds, which were black as well. I kept this part rather simple as you can see. The ones, who were like me and loved to paint little birdies on the “beach” pictures when they were little know exactly how to paint them. For those of you, who don’t, just imagine a broader shaped V and voilà!
That was easy, huh?
See you next week.
Yours truly,
Lana Hoang